Search Frugal Farming

Dasheen/Eddoes- Tips and Tricks

Growing Dasheen/Eddoes- Tips and Tricks 

$7.5m Tobago boost to grow food

ArtiesMeats.com
What would Sunday lunch (the biggest meal of the week on the islands) be without a healthy serving of Callaloo, rice, stew chicken, macaroni pie and slices of fried plantains or dasheen? In Trinidad and Tobago, dasheen and eddoes are must have ground provisions in soups and other meals. Also, planting dasheen has perks as the leafs make a popular dish called callaloo, in addition to being used for oildown which is a dish from breadfruit and saheena. Eddoes is used as a provision and sometime i've seen it in punches and pies. 

Saheena I | Simply Trini Cooking

Trinidad Callaloo Recipe (Vegetarian Version) - Zen Health
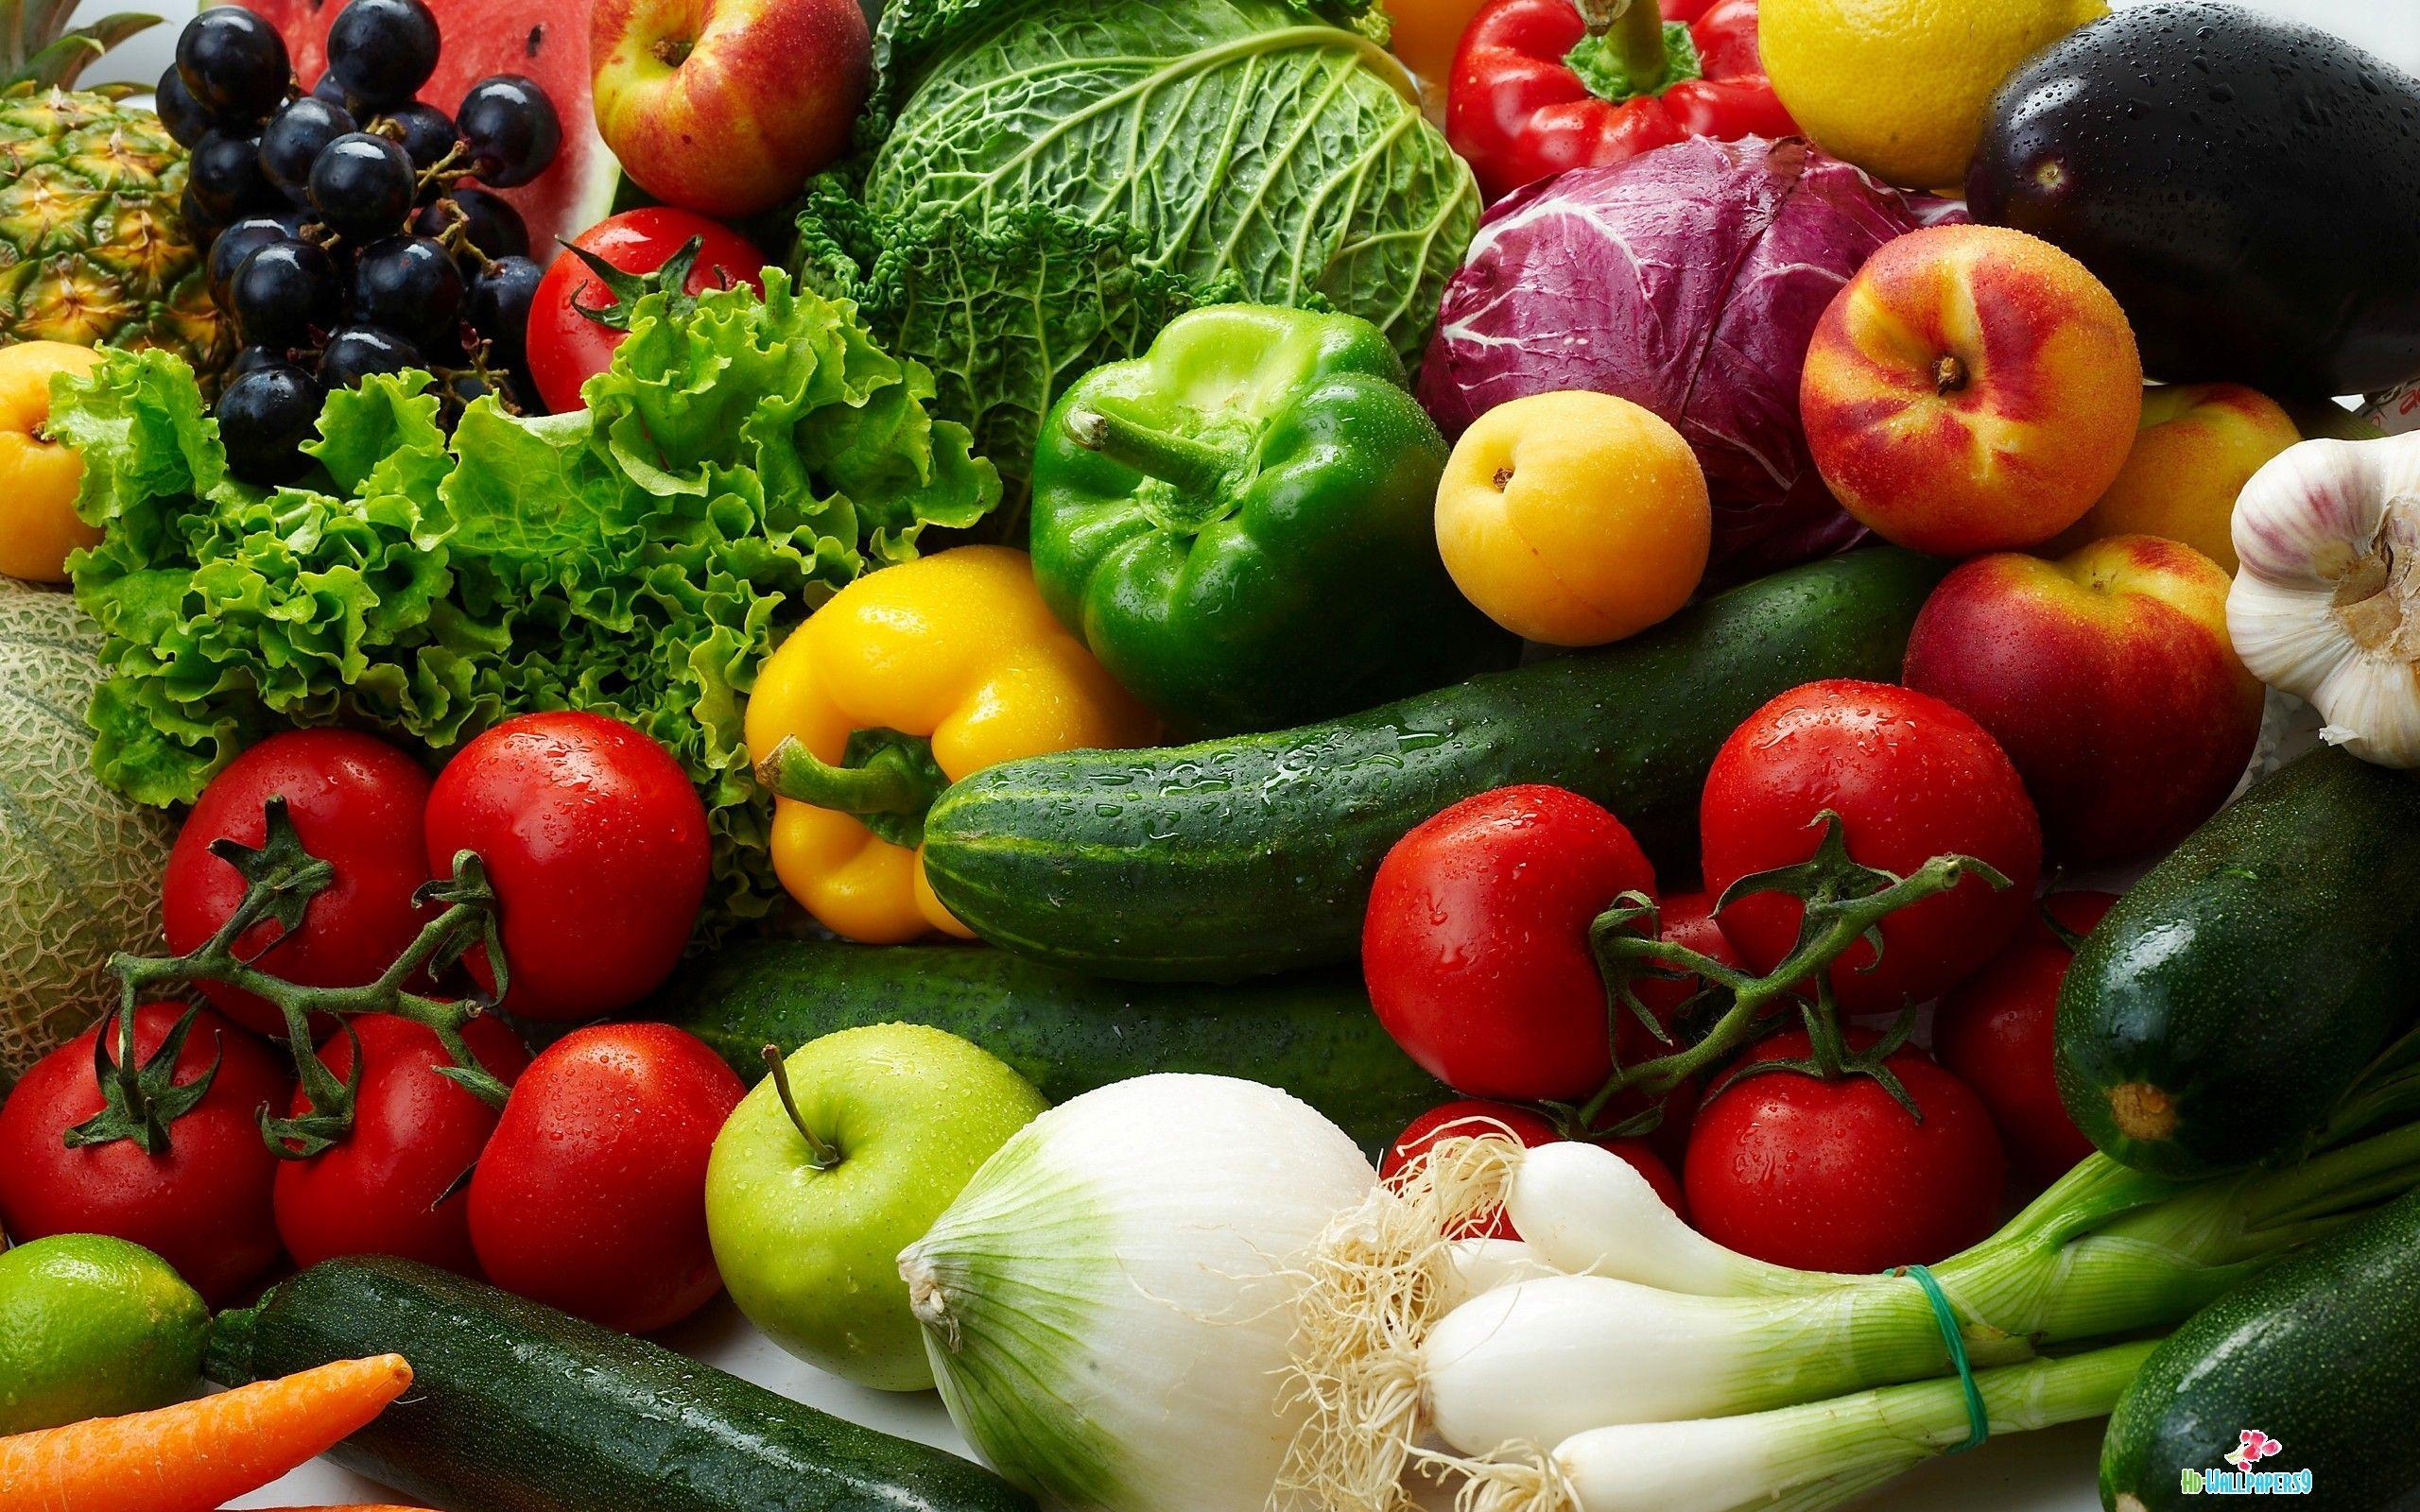
Ground provisions are delicious and they even offers exceptional nutritional value however, they sometimes get kind of pricey in the local market place, so why not plant it yourself and save during the pandemic.


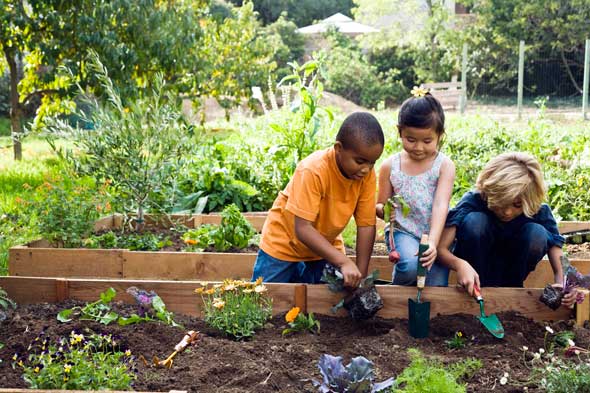
Planting your own Ground Provisions is healthy, economical and extremely convenient. Do you love ground provisions like Dasheen, Cassava and Eddoes as much as I do? Well why not grow them right in your own yard? Planting ground provisions is simple and does not require too much laborious work and as such you can Do It Yourself. You don’t specifically need any space right outside your kitchen door to create this provision garden, any cool area around your yard can be utilized.


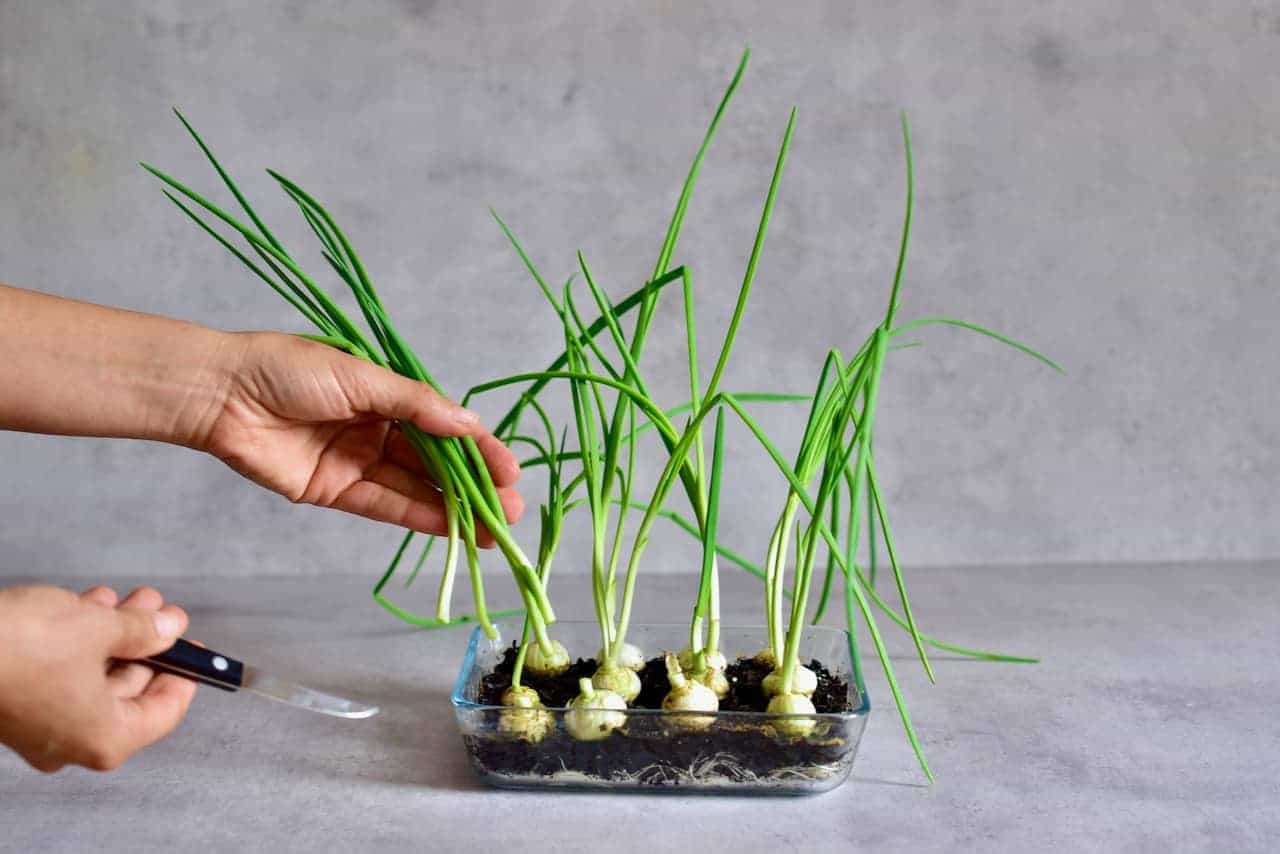
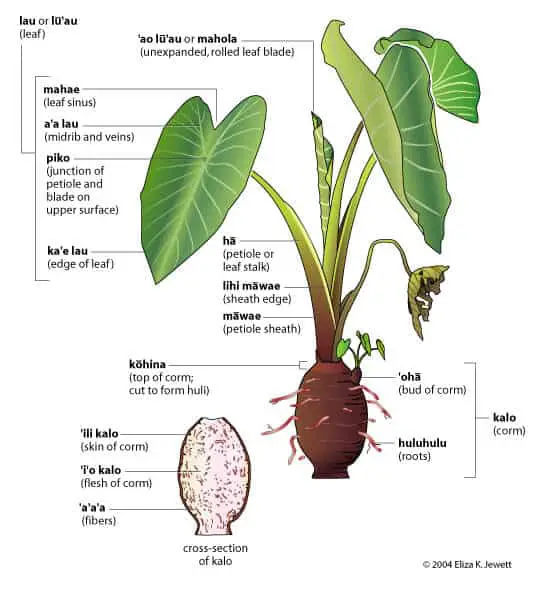
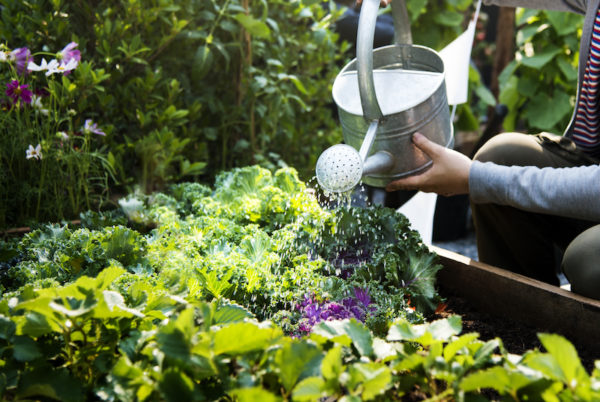
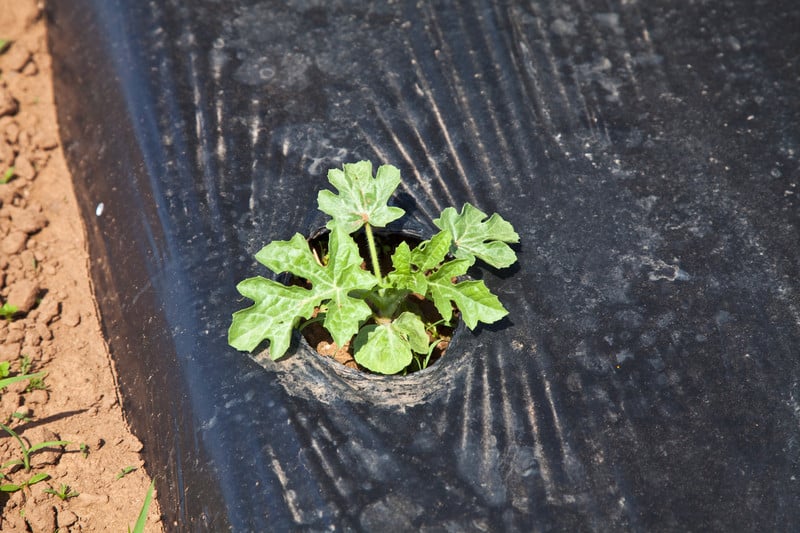
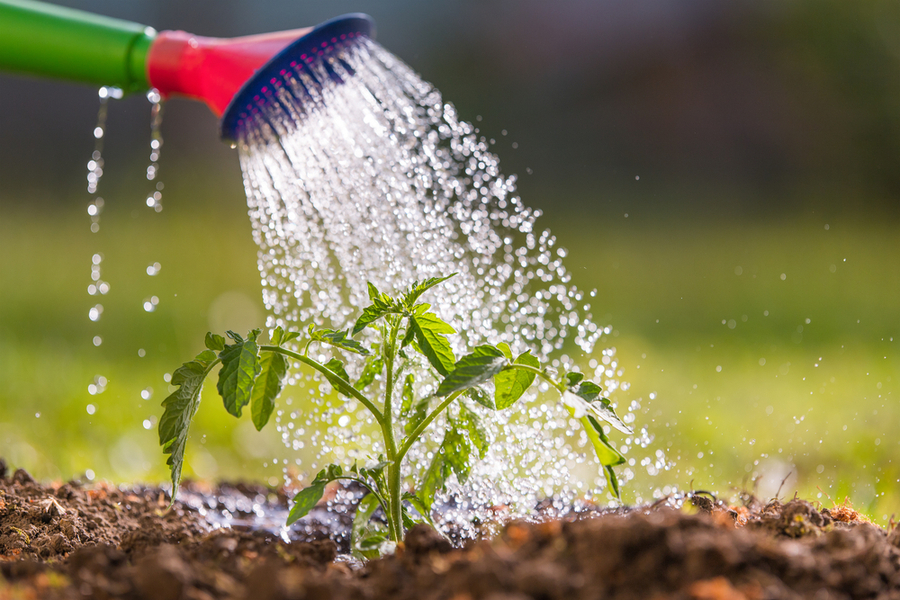
The Dasheen has a two-fold purpose, one as ground provision and the other as Callaloo bush. When planting dasheen make sure that the area is wet, as dasheen grows best in wet conditions. Plant your dasheen in an area where the soil is damp and it will thrive, if not ensure to water the dasheen stool regularly to keep its soil as moist as possible. Trini's usually plant dasheen where the waste water from the kitchen flows. There are some tools needed such as a shovel or trowel, some organic material, a sharp clean knife, a garden hose or watering can and a pair of shears. 

Taro roots slicedThe dasheen plant has tubers and each tuber has an eye, so be sure to plant the tubers three inches into the ground and a few feet apart, with each eye facing upward. It should be noted that a tuber may have more than one eye but a sharp clean knife can be used to divide the tuber so each tuber section being planted has at least one eye. After planting the tubers place some organic soil around them and water. During its growth, the damaged leaves can be trimmed and the good ones, known as ‘Callaloo Bush’, can be cut to make Callaloo. 
Trinidad Callaloo Recipe, The True Spirit Of The Islands ... The young leaves are better to use as they are softer so the Callaloo is easy to swizzle when cooked. Callaloo is delicious and rich in Iron.

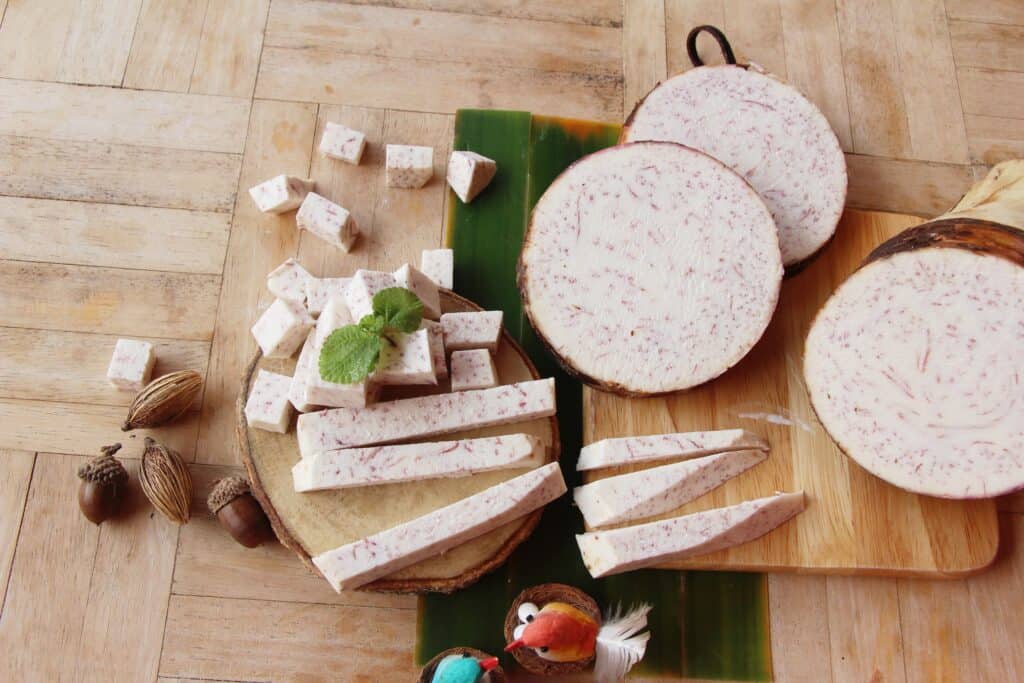
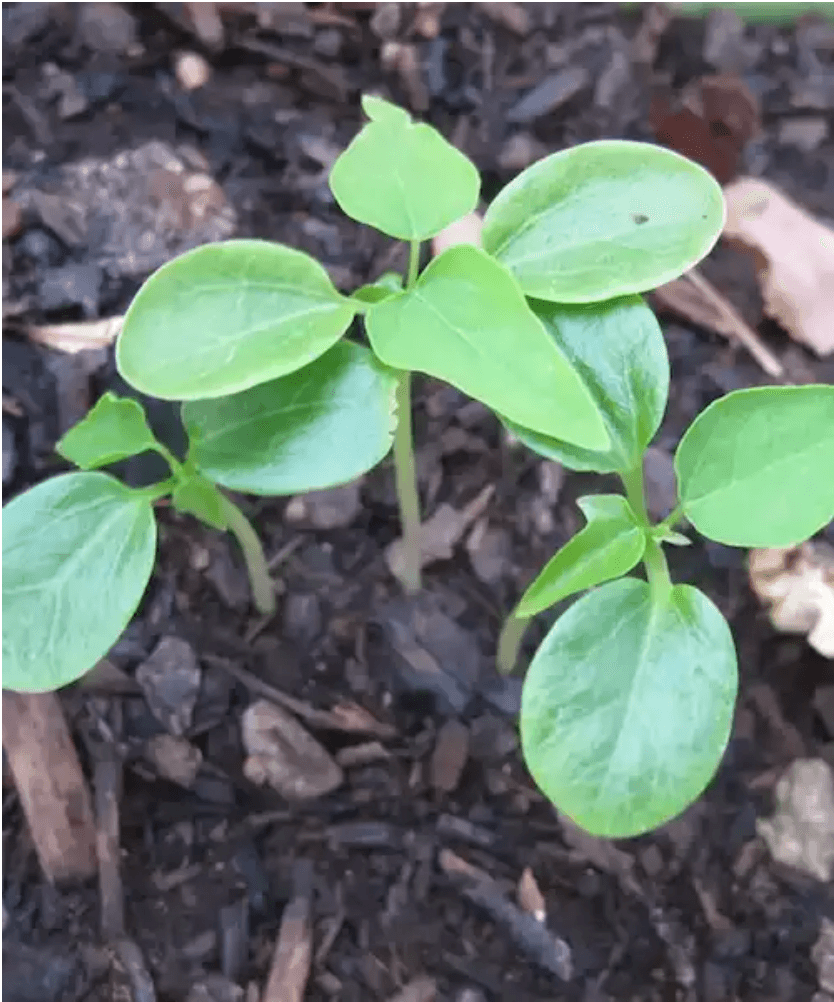
Eddoes can be considered a smaller version of the dasheen and although their leaves look similar, when pealed and cooked they look and tastes entirely different from the dasheen. After the area for the eddoes has been identified, which can be in the full element of the sun or partial shade, they should be planted, approximately a foot apart and four inches deep, after which they will grow into a clump. The leaves will wither as if they are not getting sufficient water but do not water them because the eddoes may not boil. The eddoes take at least six months to grow and sometimes up to a year. They can be reaped during the middle to the end of the dry season, which is during the months of February to May. If they are reaped in the rainy season they will not boil. For proper reaping use a trowel. While there is very little effort to grow eddoes anywhere in your garden, every effort should be made not to damage them when cutting your yard. Remember to save some of the bulbs for replanting the next season. Those you are going to eat, dry in the sun for at least a few days.


WORLD OF SCIENCE AND FACTS
Share:

Cassava Roots- Tips For Growing Cassava Plants


Growing Cassava: Planting Guide, Care, Problems and Harvest


Cassava is a wonderful, yet little known tropical root crop. The crop has been a lifesaver in many countries around the world thanks to its high nutritional value. It’s full of starch and carbohydrates, so it provides a nutritious meal, which is why its third-largest source of carbohydrates in tropical areas.

Cassava, often called yuca in other countries, is relatively simple to grow and one plant gives you an extremely generous harvest because it keeps growing from the same plant. The plant is practically pest free and drought resistant.

Trinie Style Products Ltd – CABA CaribbeanAs well as being an important staple crop, cassavas are full of nutrients and are good for digestion. The drawback is cassavas contain large amounts of cyanide, so you must cook it in order to eat it. On the bright side, the cyanide is one of the reasons cassava has few pests. Cassavas also store well and freeze well, hence its sold frozen in Trinidad.

If you can find cassava seedlings or a piece of root to plant, give growing cassava a try. Don’t let the fact that raw cassava contains cyanide put you off. 


How to Plant Cassavas


Growing Zones


Cassava is from tropical environments such as our country Trinidad and Tobago. It needs 8 months of heat to grow well, ideally zones 8-11. Growing cassava below zone 8 is impractical.When it gets cold, cassavas freeze to the ground, but they’ll come back to life and gift you with wonderful roots and leaves.

Sun Requirements


Cassava tree plant with roots | Premium Vector
As you’d expect from a plant that originates in a tropical environment, cassava thrives in full sun. It likes heat and humidity.

Soil Requirements


Cassava is one of those plants that grow well in any soil type, even poor soil. Loamy soil rich with well-rotted organic matter produces the best results, however. Cassava may struggle in clay or compact soil, but even then it will produce enough to harvest.
Soil should have a pH between 5.5 and 6.5 to produce the best results.


Container Planting


Cassava grows to up to 12 feet tall and requires a lot of space for the roots and isn’t suitable for container planting.


Planting Cassava

Tip- Be careful with the cassava stick when planting, ensure the eye or sprout is facing upwards otherwise the plant would grow downwards. 


Cassava plants are hard to find, but if you can get a hold of stem cuttings you can start your own cassava plant, which will keep you going forever.

Growing CassavaSimply take 11-inch cuttings of stems that are over a year old. Ensure you have between 4 and 7 nodes on the stem. Plant them in suitable soil either laying down on its side 2 inches deep or sticking out of the soil like a stake. Make sure a quarter of the stem is planted. Within a week or two, new leaves appear and the plant is on its way.
Then, in about 12 to 18 months’ time, you’re ready to harvest your first cassava crop. It’s that simple.

Spacing

Plant cassava at least 3 feet apart with 3-16 feet between rows.

Caring for Cassavas


Fertilizer

Your soil should have well-rotted manure dug in at the time of planting. Within two months, add more manure or a good quality liquid fertilizer.

Water

Dew Drops Of Water In Green Leaves Cassava Plants (Manihot ...Keep the soil moist in the first month of planting to give the stems a good start. If the cassava plant loses a lot of leaves it’s likely it’s not getting enough water. Cassava is drought resistant, but water well and it will produce more roots of better quality. Don’t allow the soil to stay soaked, though, as this may cause the roots to rot.


How to Harvest and Use Cassava


Harvesting Tapioca Roots: Learn When To Harvest Tapioca Root In ...Here’s where the fun begins. I chop the entire plant down with a machete, leaving about a foot of the stem behind. Carefully dig the soil away. The roots grow away from the main stem and are normally within the first two feet. Look for deep brown roots that appear flaky. Be careful not to damage the roots as you dig them up as they won’t store well. Use the branches you’ve just chopped down to create the new stems. Plant them as described above and get the next crop on the way. You can store roots in a cupboard for a week, or you can freeze them. You can also keep them peeled in water in the fridge for up to a month. Change the water every few days.

Fun Fact


Share:

You’re one in a melon!- Growing Watermelon- Tips and Tricks

You’re one in a melon!- Growing Watermelon- Tips and Tricks


Black kids eating watermelon in the summer Stock Photos - Page 1 ...Its no doubt kids love watermelon... but how often do you drive pass the watermelon sellers at the side of the road and glance across to see the price? As of today watermelon is $4.00 per lb, but in this article i'll show you some easy and frugal ways in which you can plant your own watermelon during the pandemic and even after.
I love Watermelon (With images) | Summer watermelon, Watermelon ...

Watermelons are part of the big gourd family that includes cucumbers, squashes, and pumpkins. Experts believe sweet melons were grown by ancient Egyptians as far back as 2400 BC.


How to Grow Watermelon

Melons are warm-season fruits that need a long, hot growing season to produce the juiciest harvest. Plan your garden space to allow room for the melon vines to grow several feet in all directions. Because melons are most flavorful when allowed to ripen on the vine, select varieties that will mature in the shortest amount of time, from 75 to 95 days. Keep in mind that a melon plant may only produce a few large fruits.

Watermelons need fertile soil and a long, hot growing season to produce good fruit. One of the main reasons the fruit fails to become sweet and mature is because of lack of heat during the ripening period.


Preparing your space


watermelon plants doing well | Glimmer in EternityLocate the planting space for melons in full sun. Only plant watermelons where they will receive at least 8 hours of sun per day. Consider how the vines will grow and allow room to walk through the garden without walking on or over them. Remember melons are heavy feeders so create a rich, water-holding soil by amending with compost and well-aged manure. Cow manure works best here.


Planting Your Watermelon- Tips and Tricks

  • Wait for the soil to warm to at least 70 degrees before planting melon seeds or transplants. This may mean waiting several weeks. Planting in cool weather or soil will set plants back and they’ll need more time to recover, so it pays to wait.
  • Mix compost with the planting soil at a 1 to 3 ratio and form into hills about 12 inches tall to create the rich, loose soil that watermelons love.
  • Then plant transplants 24” to 26” apart; with rows 6’ to 8’ apart. It’s important to remember that vines will spread in all directions, so don’t crowd your plants.
    How to Grow Your Own Watermelons - One Green Planet
  • Set up a drip irrigation system or a soaker hose to ensure plants will get adequate water through the season. A layer of organic mulch will help maintain soil moisture and keep down weeds in the melon patch.
    Pre-Warm Cold Soil Before Planting Vegetables - Harvest to Table
  • Cover the soil around the seedlings with black plastic -- this holds the heat in, prevents weeds from growing and keeps the fruit from developing soil borne diseases.


Watering and Fertilization  
4 Secrets To Watering Vegetable Plants And Flowers!Insufficient water is one of the primary reasons that watermelon plants fail to thrive. You'll also need to pay attention to pests and disease and may want to do a bit of pruning to encourage optimal fruit production.

Water

  • Watermelons should be watered whenever the top inch of soil dries out -- they may need up to 2 inches of water per week during hot weather.
  • Leave a hose to trickle at the peak of the planting mound to make sure the water actually gets to the roots and doesn't run off.
  • For the sweetest flavor, reduce watering as the fruit gets bigger -- at the very end, the vines can be allowed to dry out to the point where they are slightly wilted.

Nutrients

  • For lush growth, fertilize with a high nitrogen fertilizer up until the flowers and fruit begin to form, such as 10-20-10.
  • After the fruit develops, switch to a high phosphorus fertilizer, such as 20-10-10, to encourage large, healthy fruit.

Disease

  • Do not plant watermelons in beds where fusarium wilt or other diseases of the watermelon family have been a problem; this includes diseases of squashes, cucumbers, gourds, and other melons.
  • Avoid watering the leaves of the plant to help prevent foliar disease -- water at ground level only.

Funny Watermelon Joke! Answer in Comments! 

Cartoon Illustration Of Funny Watermelon Fruit Food Comic ...Watermelon Jokes

Share:

Container Grown Pawpaw Trees – Tips For Growing Pawpaw Trees In A Pot

Botanical Roots: Why you should eat paw paw | Loop News

Container Grown Pawpaw Trees – Tips For Growing Pawpaw Tree In A Pot

-----------------------------------------------------------------------------------
How to Grow Papaya in a Pot? [Step by Step Process]
62 Best Baby Faces images | Baby faces, Baby love, BabyPawpaws are like a gift from the gods! Easily grown in home gardens, their delicious, sweet flesh can be enjoyed at the breakfast table for most of the year. Native to southern Mexico and central America, pawpaw flourishes in the tropics and subtropics where individual trees can be productive for up to 6 years. During the covid-19 pandemic paw paw can offer you and your family exceptional and necessary health benefits, so planting a tree or two is a must have in your covid-19 survival garden. 

Companion Plants

Pawpaws love to grow with beans, banana, sweet potato, peppers, climbers, flowers, Eggplants, Ochro and other nitrogen-fixing plants. These companion plants protect pawpaw tree from harmful pests and diseases. But also promotes plant growth resulting in fast and tasty fruits with high yield.

Nutrition Information
100 grams of pawpaw contains 43 calories, 11 grams of carbohydrates and 8 grams of sugars. It is cholesterol free and low in proteins. Pawpaw is a good source of vitamin A, vitamin C, calcium, magnesium, iron, vitamin D, vitamin B6 and vitamin B12. So again, Paw Paw is a must have fruit during the pandemic. 
How to Grow Pawpaw Tree from Seeds in a Pot?
papaya grow in pot
Growing pawpaw is usually done by collecting the seeds from the ripe fruit. Here is the step by step procedure to grow pawpaw tree from seeds …..


  • Select a seed variety to grow them in pots.
  • Prepare a potting mix rich soil.
  • Provide sufficient water and sunlight to the plants.
  • Pawpaw requires good N-P-K fertilizers to thrive faster.
  • Use organic fertilizers to deter pest and disease problem.
  • Harvest pawpaws when fruit turns yellow in the hot-temperate zone.
Choose desired seeds & pots 
You can select the seeds from pawpaw fruit to grow it in pots or purchase hybrid seeds from nursery or garden center. Aranguez Nurseries has these. Pawpaw seed varieties are based on size, taste, growing regions and fruiting time. Choose a big pot or container about 15-20 inches to grow dwarf variety pawpaws.

Prepare Soil

3 Steps to Prepare Your Garden for Planting | The AgriBusiness ...
For tropical plants such as pawpaw choose a nutrient-rich potting mix soil. You can prepare the soil by adding garden soil to the compost in the ratio of 1:2. Pawpaw grows well in loamy, sandy or rocky soils with a pH of 4.5 – 8.0.

Water & Sunlight

Water thoroughly and monitor the moisture levels by keeping the soil damp but not soggy. As it grows to increase the amount of water supply to the plants. Prefer full sun for better growth. If you start growing pawpaw indoors make sure the plant receives sunlight minimum of 6-8 hours a day.


Pawpaw fruits thrive faster in warm climatic conditions. To maintain the best temperature to produce tasty fruits is 70 – 90 F. It can also damage plant growth if the temperature is below 31 F.


Planting

Planting and management of papaya tree using irrigation - YouTube

Now sow the seeds in large containers. Spacing should be 2 inches apart from each other. To germinate the seeds quickly, use sterile potting mix soil such as vermiculite. Seedlings may appear after 2 weeks. Dwarf varieties grow to a height of 6 feet.
Pollination

To develop pawpaw fruit pollination is a must. Pollens must be transferred from male gametes to the female gametes in plants. Flowers cannot transfer pollens by their own, so they attract insects such as honeybees, butterflies, and birds to transfer pollen grains for the fruiting purpose.

How to Naturally Get Rid of Pests in Your Home
To deter pests and diseases, spray ammonium sulfate solution on pawpaw plants.  Pests or insects don’t like this solution and hence be away from plants. You can prefer other organic methods to overcome this problem.

Fertilizers


Shopping list growing pawpaw australia.inddPawpaw trees require better fertilizers to ensure fast growth and development of the fruit. Apply fertilizers such as N-P-K (Nitrogen-Phosphorus-Potassium) on plants in the ratio of 10-10-10 or 14-14-14 for root establishment. You can also add organic compost, manure or mulch to the soil.


Harvesting

Harvest pawpaws only when fruit turns yellow. Pawpaws are ready to harvest after 6-9 months from seeds in the hot-temperate zone. It takes 9-11 months time to harvest in moderate temperate zones. Cut pawpaws using gardening tools (sharp knife or scissors). If you left it to ripe then mosquitoes and birds damage the fruit. Before eating store them in a refrigerator for 2-3 days and consume the fruit when it is half yellow.

Pawpaw Health Benefits


Pawpaw is a natural remedy for treating many diseases like heart problems, cancer, atherosclerosis and digestive health.


  • Boost Immunity: Immune system protects you against various infections that make you really sick. Vitamin C in pawpaw makes you build strong immune system.
  • Arthritis: Arthritis is a deadly disease and may reduce lifespan significantly for those who suffer from it. Eating pawpaw is good for your bones and has inflammatory properties that can control arthritis problem.
  • Easy Digestion: Pawpaw contains an enzyme called papain to treat digestion problems. It is also high in fiber and water content to prevent constipation, promotes regularity and healthy digestive tract.
  • Improves Heart Health: Potassium and vitamins in pawpaw help to deal with heart disease. An increase in potassium intake in your diet reduces the risk of cardiovascular disease and other heart problems.
  • Weight Loss: Pawpaw is also good for the people who are trying to lose weight naturally. Eating pawpaw in the morning or evening snack times is good for your health as it promotes the feeling of fullness and controls cravings. It is also beneficial for promoting wound healing and prevents infections in burned areas.
  • Cancer: Consumingbeta-carotene found in pawpaws may reduce the risk of cancer. It also plays a vital role in curing prostate and breast cancer for women.

HEALTH BENEFITS OF PAPAYA / PAWPAW — Coconet

How do you pick a ripe pawpaw?

Croc destination: Skybury Tropical Plantation – Crocodile Trophy
Look for yellow pawpaws or little green color. Fruit turns bright yellow when it is fully ripe. Also, prefer a firm pawpaw with smooth skin and big size. Avoid damage, cut or the soft fruit.

Click below for a delicious pawpaw smoothie recipe!


Share:

Growing Bananas During the Pandemic

Growing Bananas During the Pandemic


Tips and Tricks For Growing Bananas During The Pandemic. 


Frugal Farmers, you may be wondering why would I do an article on planting bananas during the pandemic. After all, bananas take an average 9-12 months to grow and the pandemic may well be over. Well, if you have kids i'm sure you buy bananas as kids love these. However, there are multiple uses for this plant. Having grow up in the country i'd never thought i'd see a day when they actually sold banana leaves. I recently saw this in Massy and i'd update this article next time I visit the supermarket for a picture. 


Banana leafs are traditionally used in making 'pamie' and the famous Christmas dish 'pastelle'. So it seems only appropriate to plant bananas now as you would surely save some money or time for Christmas as you wouldn't have to look for banana leafs.


Planting The Banana Tree


Bananas are one of the most consumed and cheapest fruits worldwide: they are the most traded fruit and the fifth most traded agricultural product.  

Believe it or not, plenty folks don;t know how bananas are grown. Bananas trees or 'suckers' as we call it locally is dug out and transplanted to where you'd like your tree to grow. Also, growing Banana trees in pots are as easy as peeling and eating one. If you wish to grow one at your home here is the guide. There are banana varieties that can withstand temperature drops and grows well in containers, popular especially among the fans of exotic tropical plants in the garden. There are banana varieties that can withstand temperature drops and grows well in containers, the favorite exotic tropical plants for the backyard.You may have a question in mind, will the plant bear fruit if grown in the pot ? And the answer is yes. It is possible, a banana tree bears fruits in pot prolifically.

Growing Banana Plants in Pots
Banana is a lush green, fast-growing plant that can give any place a tropical look and feel. Many varieties become excellent houseplants that don’t need much care and grow up very  quickly. Dwarf varieties of banana trees can grow anywhere between 2 to 4 meters. Compared to the ordinary banana trees that can reach up to 15 meters high.
Harvesting Banana Trees: Tips On When And How To Harvest Bananas ...
Banana plants love full sun, heat and humidity. If you’re growing a banana tree, you should keep it in a spot that receives the sun most of the day but preferably sheltered from the wind.
10 reasons why bananas are good for your health! | TheHealthSite.com
Growing Banana tree requires well-draining soil, sandy soil that is rich in organic matters and compost. Buy a good quality potting mix for your banana tree. If you are making it at home, make sure to mix sand, perlite, and compost or manure.
Banana needs slightly acidic to a neutral soil to produce those potassium rich, nutritious bananas. The soil pH should be around 6 – 7. If your soil is alkaline mix sulfur to decrease the pH. Banana loves moisture. Water it regularly and deeply but care not to over water. In summer, water it every day. It may need water even two times a day in hot weather or when it is root bound. Soil for growing banana plants should be kept uniformly moist. 

Pests and diseases

Bananas are quite resistant to diseases, still, when you see the leaves turning brown and drying at the edges it means you’re over watering and if the leaves turn yellow, banana plant is having a lack of nutrients. Some pests that might attack banana plant are banana aphids, banana weevil, and coconut scale. These pests can easily be repelled using organic pesticides.
Some horticulturists believe that bananas were the first fruit on earth! Whats Your Thoughts??? Answer In Comments! 
Click the video below to see a surprising history of bananas. 

Share:

Planting Pimentos and Hot Peppers- Tips and Tricks

Planting Pimentos and Hot Peppers- Tips and Tricks


First things First Frugal Farmers... DO NOT plant these two peppers together. I recommend at least 20-25 feet apart because these hot pepper plants would certainly turn your pimento peppers HOT when they are used. Gents... this could get ya in some trouble so plant far apart.

 Planting Hot Peppers


Hot Pepper evolved in our part of the world, so they are perfectly adapted to our environmental conditions. Peppers contain capsaicin, which is used in a variety of medicines to treat arthritis, cancer, inflammation, pain and a variety of other ailments. Peppers are also high in vitamin A, B and C. One plant will provide all the peppers the average family needs.

As a start, transplant seedlings when seedlings are 3-4 weeks old. Late in the afternoon or evenings is better to plant them so they don't get to much sun on their first day at their new home. Ensure the hole is large enough to hold the seedling’s root plug. Mix two handfuls of well-rotted manure with the soil in each planting hole and into each planting hole place one seedling and ensure it is firmly positioned. 

Water seedlings immediately after transplanting. In the absence of rain, water daily; ensure that excess water drains off the planting area.

Planting Pimentos 

Pimento Pepper, Chile, Trinidad Seasoning Pepper ! Trinidad pimento peppers are also known as seasoning peppers. I would have to say that pepper is adored by Trinidadians and is easily the most popular cooking pepper in the country. Unfortunately it is little known outside of the Caribbean or places that have a large West Indian population. The flavor is really impossible to describe. When you cut it it smells like its going to be hot and I suppose it can be said to have the flavor of a hot pepper but without the heat if that makes sense. It is most definitely not a sweet tasting pepper like a bell pepper.
GROWING PIMENTO SEEDS

1. where gloves
Live Plant- Trinidad Pimento Pepper a.k.a. Caribbean Seasoning ...2.always wash your hands even after you take you gloves off
3.have some lime juice to dump on your hands if they are burning as its said to relief the burning
4.never rub any sensitive area like your eyes and so forth.
5.before you take your gloves off be sure you are completely finished at what you are doing
6.some times double up on your gloves as the burn can still find its way in at times

PLANTING THE PIMENTO PLANTS
Sow pimento seeds indoors ¼" deep. The seeds germinate best in warm soil, so gentle bottom heat may be helpful until seedlings emerge. Wait to transplant outdoors until soil is warm.
Pimento varieties come from tropical humid regions. The temperature, moisture, and air circulation all play a role in growing plants from seeds. Too little heat, too much moisture, and lack of air circulation will cause poor results. Pimentos often like to take their sweet time germinating. They can be up in a week, and some will take almost a month. Even with paper towel germination testing, they can take long. I am not sure why, but it is a normal occurrence. So plan and make sure you start them early enough! Also, remember they like heat to germinate so make sure you have a heating mat or something to keep the soil warm. Placing them up on top of the fridge often works too since it is normally warmer up there. In Trinidad we plant all of our peppers with a good shovel full of compost in the planting hole, and then give them a good dose of compost tea every few weeks for the first 6 weeks of growth. We also mulch around each of our pepper plants with a good 1 to 2″ thick layer of compost. Pimentos can be grown all year long in frugal containers. It is suitable for apartment dwellers and gardeners who live in cool regions where the number of growing days are limited. Many pepper enthusiast grow peppers in pots so they can have fresh peppers all year long. It’s best to use 5 gallon containers so the roots do not get too over-crowded.
Share:

Featured Post

Dasheen/Eddoes- Tips and Tricks

Growing Dasheen/Eddoes- Tips and Tricks  What would Sunday lunch (the biggest meal of the week on the islands) be without a healthy s...

Contact Us

Name

Email *

Message *

Translate